|
Print
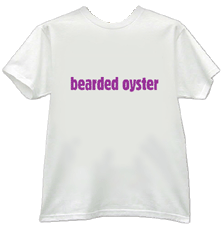
your favourite Geuzennaam on your own T-shirt or any color cotton
or 50 / 50 blended fabric.
|
 |
|||||||
| Printing & Application instructions | ||||||||
| 1.
Make sure that you have selected 'Mirror', 'Flip', 'Reverse' or a
similar setting in your application, if it is required, so that the
image will be printed backwards. The PDF files which are downloadable
from this page are already set in reverse. 2.Test by printing your image on a sheet of plain paper. 3.If you are satisfied with how your image looks, insert a single sheet of E-Z in your printer. |
4.
It is easy to tell which side to print on, as one side is blank (to
print on), do not print on side with lines, color or text. Make sure
that the paper is not creased or curled. 3. If you are satisfied with how your image looks, insert a single sheet of E-Z in your printer. 4. It is easy to tell which side to print on, as one side is blank (to print on), do not print on side with lines, color or text. Make sure that the paper is not creased or curled. |
5.
In your printer driver, select the highest dpi setting and the correct
paper setting for your type of printer 6. Set the paper thickness lever on your printer for standard paper. Print your image. 7. Remove your printed sheet from your printer and allow the ink to dry. Do not handle the paper while the ink is drying. |
||||||
| Hand ironing the image | ||||||||
| 1.
Preheat the iron on its highest temperature setting for at least 8
minutes. 2. The iron must be very hot! Do not use steam. 3 .Place the pillowcase on the ironing surface with the open end hanging over the edge and smooth it flat so that there are no wrinkles. 4. Do not use a soft surface or a surface that will melt from the heat of the iron. 5. Place the article on the pillowcase so that the area that you want the image to be transferred to is centered on the pillowcase surface. Smooth out the fabric so that there are no wrinkles. |
6.
TIP: You may want to iron the pillowcase and the fabric so that they
are both smooth before ironing on the transfer. Be sure to let both
of them cool completely before placing the transfer on the fabric. 7. Preheat the garment for a few seconds to remove any excess moisture from the fabric and allow the fabric to cool. This will aid in the adhesion of the image to the fabric. 8. Place the image to be transferred face down on the garment in the desired position. |
9.
The image now needs to be 'set' on the fabric (so that it does not
move while being transferred). To do this, press the iron firmly over
the transfer for 15-20 seconds in several areas, making sure to cover
the entire transfer in this process. It is important that you press
straight down for this step and lift up the iron completely when repositioning
to do another area. Then, using a circular motion and light pressure,
evenly heat the transfer for another 15-20 seconds. Put the iron down
and gently rub the hot transfer with your soft, clean cloth for 5-10
seconds. 10. You can now either remove the paper while the transfer is hot for a satin finish or let cool for a glossy finish. |
||||||